
make a donut vase
In this short video, we'll teach you how to hand-build a donut vase.
VIDEO COMING SOON* 
Before you get your hands messy:
Put on your favourite record or Spotify playlist (@modeletto.store for some of our tunes).
- Grab a chopping board to work on and a small bowl of water.
- Get your clay pouch + tools ready
Kit used in this tutorial here.
1. Roll a ball of clay about the size of your fist in your hands to warm.
2. Start rolling into a large cylinder shape. You can use the surface you’re working on to roll if this is easier.
3. Make a circle shape with your cylinder and score + slip the edges then use your blending tool to blend them together.
4. With a damp sponge, smooth any cracks or lines out on both sides of the circle.
5. Make a flat edge on one side of the circle by lightly tapping on your work surface, then using your thumb or knife tool you can exaggerate the flat piece whilst the donut vase is laying on its side.
6. Using your pointy tool, make a hole in the top of your donut to 3/4’s of the way through. Then do the same but go in on an angle through the donut.
5. Option to add a neck - roll a little ball of clay into a thick short cylinder shape then poke a hole through using your pointy sculpting tool. Flatten each end by gently tapping on your chopping board.
Score the top of your vase + moisten the scored edges with a little water. Do the same to one end of your cylinder then put it on top of the vase, matching the holes. Using your blending tool, blend the two shapes together, then smooth with your sponge and a little water.
7. Dampen the sponge and gently smooth the outside of your vase.
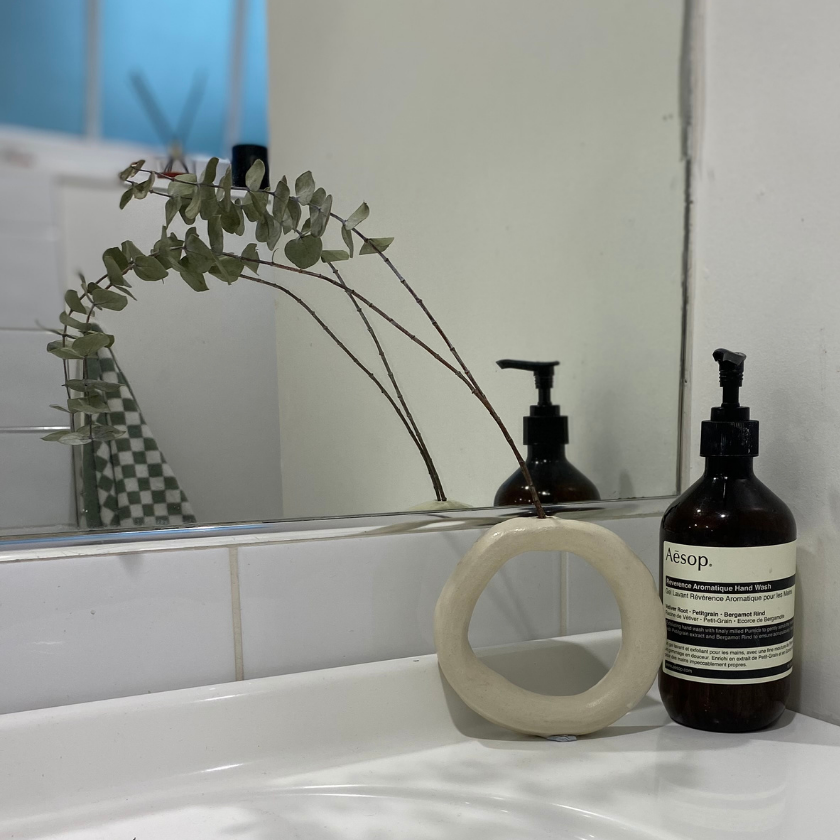
8. Let it dry for 24-48 hours then seal with two coats of sealer (like these pieces pictured here) or paint it with acrylic colours then apply two coats of sealer.
NB: This vase is not water safe if you just leave it to air-dry, so if you'd like to put a real flower inside with water you must get your vase fired. Head to our FAQ page for firing instructions. Take the stress out of the firing mission and pop a dried flower in 🙃 Don't apply paint or sealer before firing.
We'd love your help with our purpose to introduce more play into everyone's day. Share your kit, creation process, or finished shape on your stories or feed - tag @modeletto.store, so we can re-share.

