
fem body video tutorial
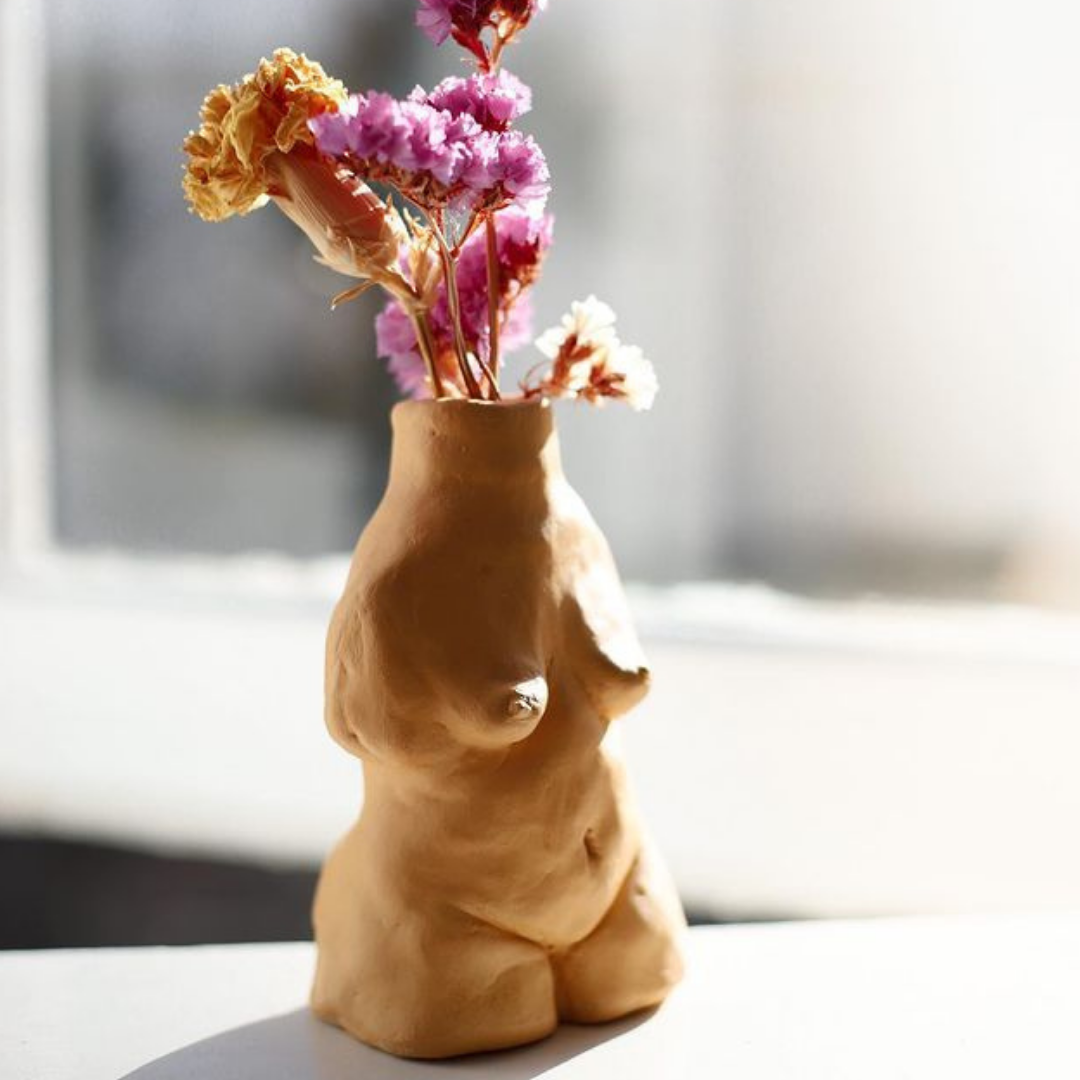
In this short video, we'll teach you how to hand-build a fem body vase.
Before you get your hands messy:
Put on your favourite record or Spotify playlist (@modeletto.store for some of our tunes).
- Grab a chopping board to work on and a small bowl of water.
- Get your clay pouch + tools ready
Steps:
Plan Your Design:
Whenever we mention:
- Score: use your pointy tool to etch small lines into each surface to be joined.
- Slip: dip your finger in the water and apply a little amount to your scored lines.
Prepare Four Balls of Clay:
Divide your clay into four equal-sized balls. These will be used for the neck, torso, and two lower body portions.
Form the base:
Take two balls of the clay, join them together side by side and shape into thighs and bum. Add the second ball on top of the two then mold and pinch the clay to create the basic upper body shape.
Create the neck:
Take another clay ball and add this onto the body. Shape it into a neck. Use your pointy tool to draw a circle on the top of the neck - make sure there is enough space on the outer of the circle so that the walls are 1cm thick. Use your wire round scoopy tool to scoop out the clay to make a hollow neck. Use the excess clay that you've scooped out to create boobs and nipples, then slip and score them to attach and blend.
Refine the Details:
Use sculpting tools to add features, belly button and other bits. Refine the shape of the vase to ensure it captures the feminine form.
Texture and Smooth:
Smooth the surface of the clay with your fingers and sponge to create a polished appearance.
Check Proportions:
Regularly refer to your reference images to ensure that the proportions of your woman-shaped vase are visually appealing and accurate.
Allow to Dry:
Slow dry under plastic for a day or two then leave it to dry
Painting (Optional):
If you want to add colour to your vase, use acrylic paints once the clay is fully dry.
Finish and Seal (Optional):
Apply our sealant o to protect the surface and enhance the overall finish.
Remember to embrace the creative process and have fun with your project. Feel free to experiment with shapes, poses, and details to make your woman-shaped vase truly unique.
Kit used in this tutorial here.
NB: This vase is not water safe if you just leave it to air-dry, so if you'd like to put real flowers in, you'll need to get your vase fired. Head to our FAQ page for firing instructions. Take the stress out of the firing mission and pop a succulent in your pot that doesn't require water to stay alive 🙃 Don't apply paint or sealer before firing.
We'd love your help with our purpose to introduce more play into everyone's day. Share your kit, creation process, or finished shape on your stories or feed - tag @modeletto.store, so we can re-share.


...)